Migrating from Vault22
This guide will walk you through how to import your historical transactions from Vault22 into FinWise. The process takes about 10-15 minutes and will bring over all your transaction history.
If you prefer to watch a video walkthrough of how to import your data from Vault22, watch the tutorial here.
Step 1: Connect Your Account (Optional)
If you'd like your data to automatically sync going forward, start by connecting your bank account to FinWise.
Go to the Accounts page and click "New Account". Type in the name of your bank or institution and select it from the list. You will be connected through one of our 3 secure data providers and prompted to enter your account details.
It may take a few minutes to pull your recent data (usually 1-3 months) from the institution. Once connected, new transactions will sync automatically.
Step 2: Export Your Data from Vault22
Next, download a CSV export of your transactions from Vault22.
In Vault22, go to the Transactions page and click the "Export" button in the top right corner. Make sure you have cleared any date filters so that you export your full transaction history.
Step 3: Start the Import in FinWise
In FinWise, go to the Transactions page and click "Import Transactions" in the top right corner.
Select the CSV file you just downloaded from Vault22. Your CSV may contain data from multiple accounts – that's fine! Click Continue to proceed.
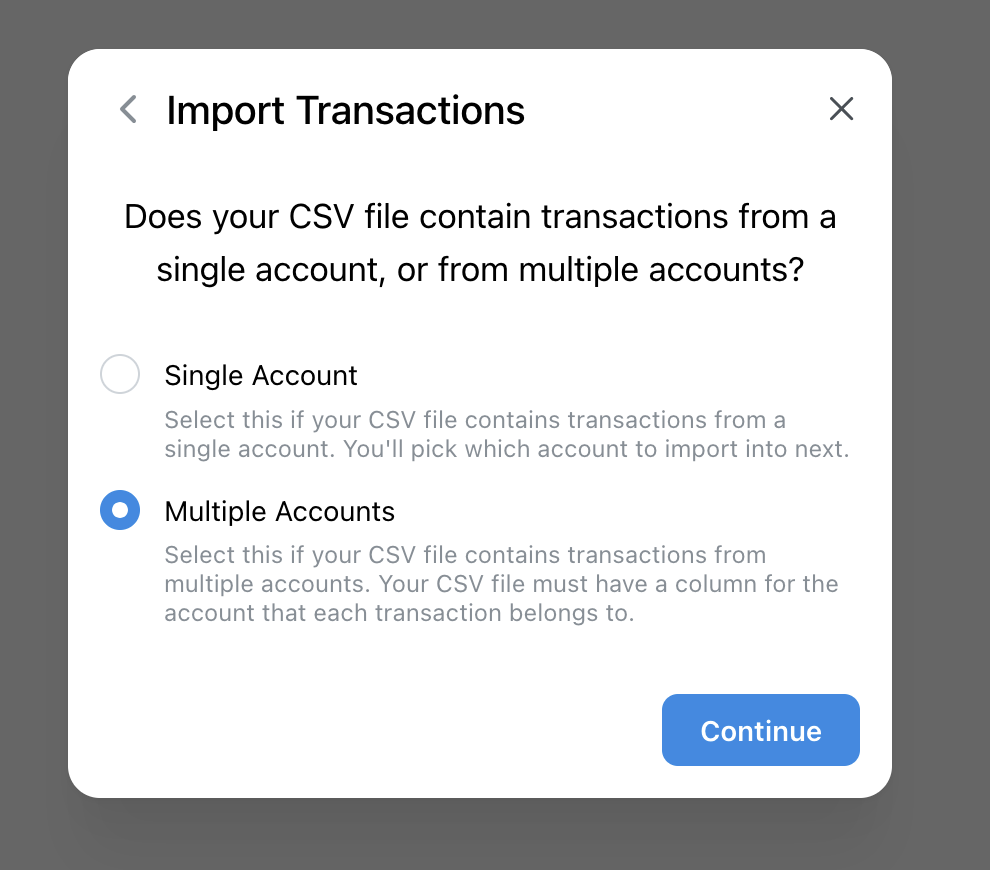
Single or Multiple Accounts
If your CSV contains transactions from multiple accounts (which Vault22 exports typically do), select "Multiple accounts". Otherwise, select "Single account".
Step 4: Map Your CSV Columns
You'll see a preview of your CSV data in FinWise. Now you need to tell FinWise what each column represents.
The required columns are: Account Name, Description, Date, and Amount. You can also optionally map columns for Categories and Tags if you want to preserve those from Vault22.
Click on each column header to assign it to the correct field.

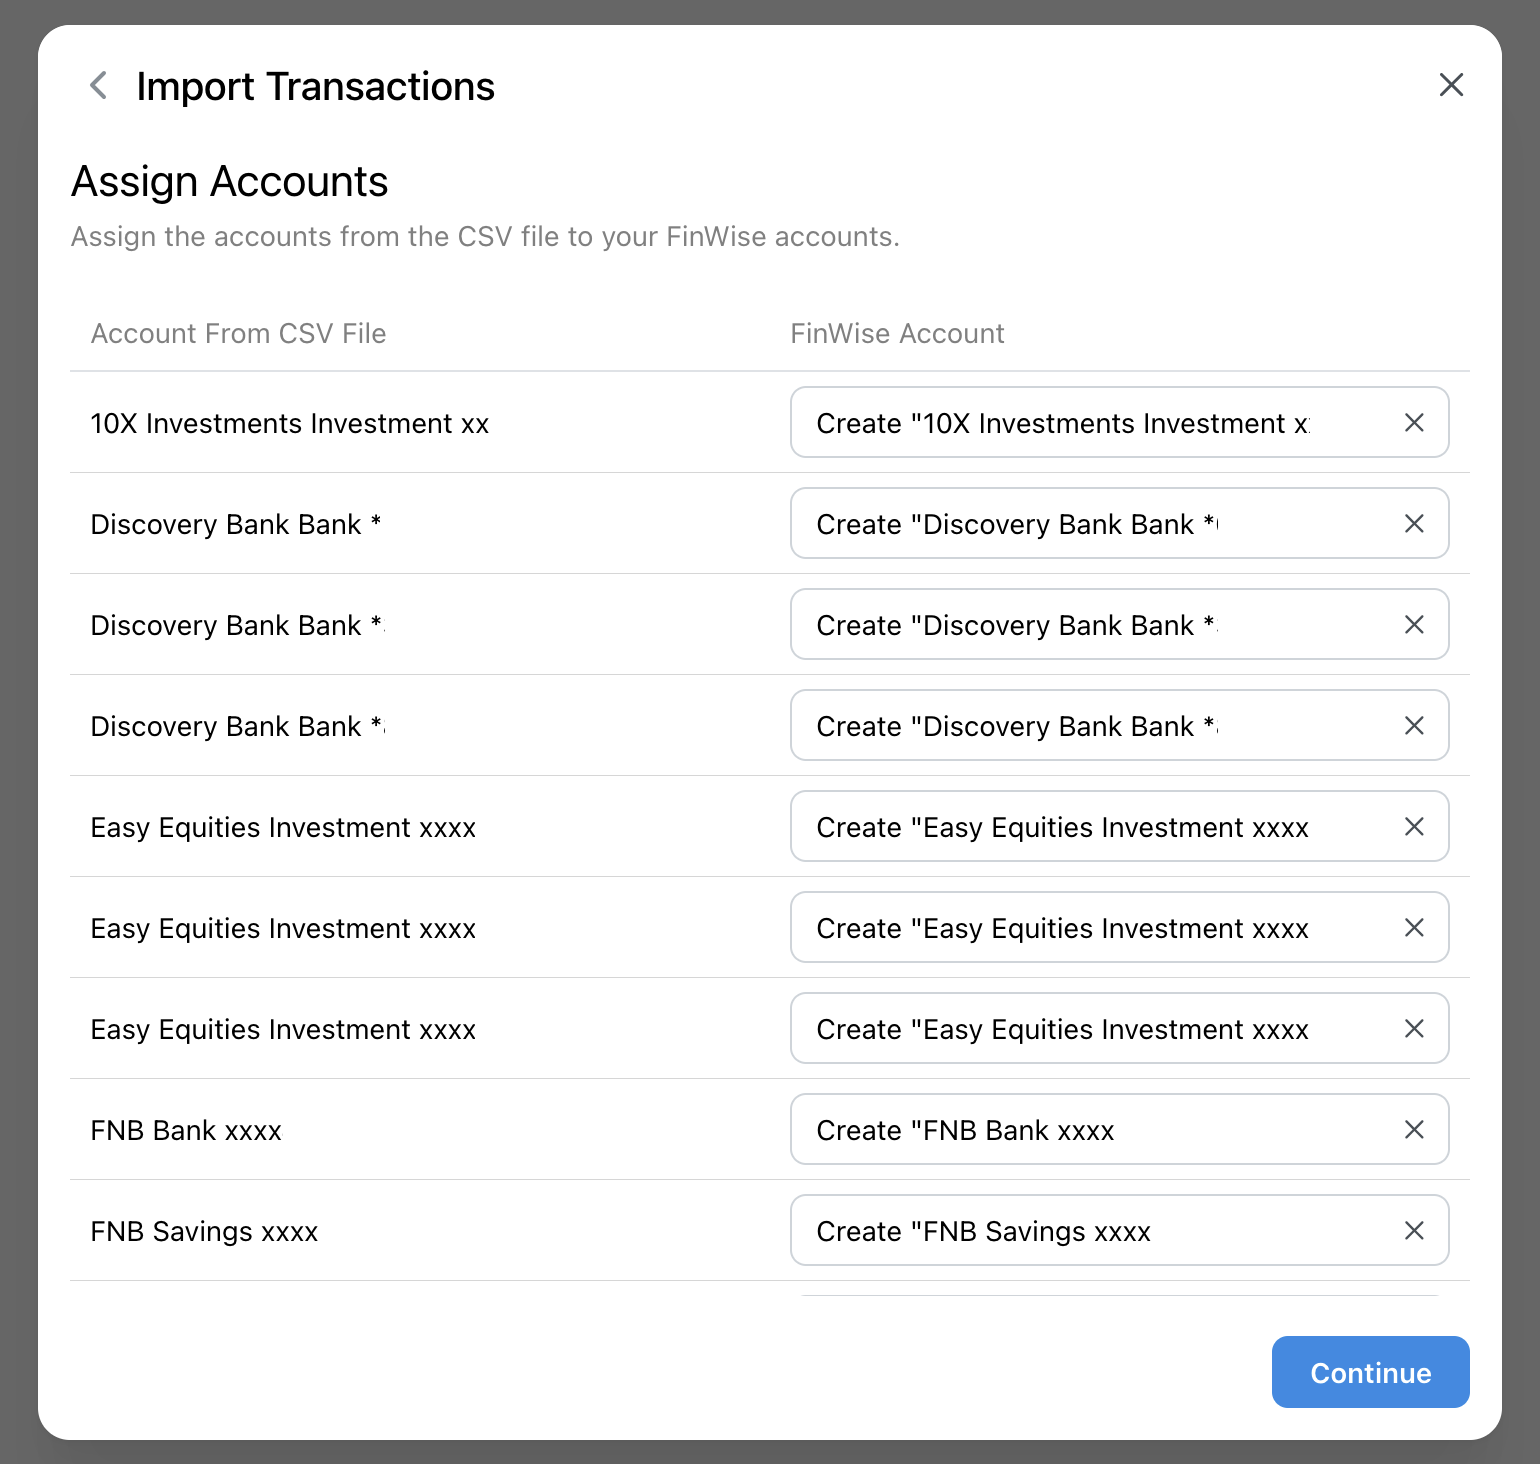
Step 5: Match Accounts
After mapping your columns, you'll be prompted to match the accounts from your CSV to your FinWise accounts.
If you connected your bank in Step 1, make sure to match the CSV account to your connected FinWise account. This ensures transactions aren't duplicated.
You can also check the Options menu if your CSV has an unusual format that needs special handling.
Step 6: Complete the Import
Click Import to start the process. Depending on how much data you have, this may take a few minutes. Do not close this window while the import is in progress.
If you didn't map a Categories column, FinWise will automatically use AI to categorize your imported transactions.
Step 7: Review Your Data
Once the import is complete, close the window to see your newly imported transactions. Transactions with a blue dot are marked as unreviewed – you can click through them to verify they're correct.
From the transaction list, you can:
• Reassign categories by clicking the category badge
• Click on any row to open the full transaction details
• Upload attachments like receipts
• Mark transactions as recurring
• Add notes to remember context about a transaction
• Add tags to make transactions easier to search and filter

You're Done!
That's it – your Vault22 data is now in FinWise! Take some time to explore your imported transactions and set up any categories or budgets you need.
If you have any questions or feedback about the import process, contact our support team.